Heat from the Earth

Long time readers will recall that we installed a geothermal heating system to replace our old heating oil furnace.

Here are a few more details about the geothermal thermal system and the installation process.

A geothermal heating and cooling system is essentially a heat pump system that uses the relatively constant temperature underground to move heat from one place to another. The systems are also sometimes called ground source heat pumps.  In the winter, the system pulls heat from the ground and moves it into the house. In the summer, such a system can move heat from the house to the ground. Because our house does not have air ducts and instead relies on baseboard hot water radiators, our system is currently set up only for heating, though the ground loops and the heat pump can be used for cooling in the future if we make a few changes inside the house.

Our system is a closed loop system – meaning water (plus a type of antifreeze) is circulated in a loop of piping from the house to wells underground and then back up to the house to start the loop over.

The loop piping in the backyard before installation.

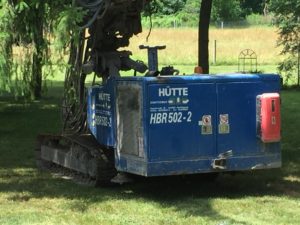
Our installers used a specialized German drilling rig that can fit in tighter spaces compared to some truck based drilling rigs. It was able to move right into place in the backyard for drilling.

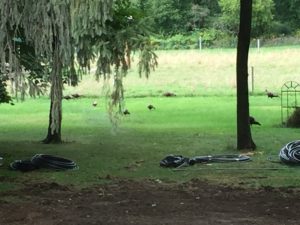
The specialized German drilling rig.

Continue reading

Cookies!

Every year for the holidays, I make several varieties of cookies to share at my workplace. The most common are chocolate chip cookies.

Chocolate Chip Cookies

The “secret” recipe I use is actually basically on the back of the bag of chocolate chips with a couple of small modifications.

  1. Beat 1 cup (2 standard sticks) of butter, 1 cup brown sugar, and 1/2 cup granulated white sugar until creamy.  I prefer to use unsalted, uncultured pasture butter, but other butter works well.
  2. Beat in 2 large eggs, one at a time, until well blended. I prefer to use farm fresh eggs from free range hens for the extra bright orange egg yolks.
  3. Add in 2 Tablespoons water and 1 Tablespoon pure vanilla extract and then blend well. This is a difference from the “traditional” recipe – the traditional only uses 1 teaspoon of vanilla.
  4. In a separate bowl, combine 2 1/2 cups all-purpose flour, 1 teaspoon baking soda and 1 teaspoon salt. For the flour, I sometimes use 1 cup of whole wheat white flour and 1 1/2 cups of normal flour to add a little more chewiness to the structure of the cookies.
  5. Gradually stir the flour mixture into the butter/sugar mixture.
  6. Stir in one normal bag (12 oz) of chocolate chips. For a little more sugary taste, use milk chocolate chips. For a more traditional, use semi-sweet chips. For other options, try mint chocolate chips or other flavors.
  7. Once the dough is prepared, try to not to eat all of it raw! If you succeed in not eating all of the dough raw, roll the dough into teaspoon size balls and place on a baking sheet about 2 to 3 inches apart. The greater amount of whole wheat flour that you use allows you to space the cookies closer together as the whole wheat flour helps the cookies stay more compact while baking while cookies made with white flour tend to expand a bit more while baking.
  8. Bake at 375 degrees for approximately 8 or 9 minutes. Note that the traditional recipe calls for 12 to 15 minutes but that makes the cookies too crisp for my liking. Also, at around minute 6 and again when removing them from the oven, I smash down the cookies with a spatula to keep them thin and prevent the middle from fully cooking.
  9. After a few more minutes on the baking sheet, remove the cookies to cool on wire racks. Usually the cookies are still droopy and some may fall between the wire racks – this is as intended. Once fully cooled (or even before), the cookies will be deliciously soft and ready to eat.

Continue reading for the peppermint candy cane cookie recipe.

Continue reading

How to Build a Tack Box in 3 Easy Steps

Horses have a lot of paraphernalia. To store it all, a horse owner usually has at least 1 tack box. As we have a horse, we were in need of a tack box to store at least some of our horse’s tack at the stable.

I decided to try and see if I could make a tack box instead of buying it. It turned out to be very easy with 3 easy steps (and a 4th optional step if desired).

Step 1: Search all of your property (especially outbuildings and old barns) for an old tack box or trunk and select the one you want to use.

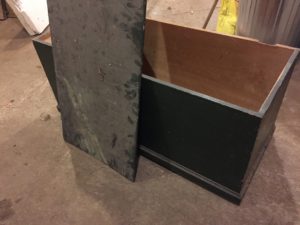
I started by checking the piles of items in hayloft to see if there were any old trunks or crates that could serve as the starting point for a tack box. It turned out that there was a dusty, old, broken trunk in the hayloft. The base was mostly intact but the hinges were broken and had ripped off the box. I found the missing lid nearby.

Here is the old, broken box from the hayloft.

I brought it down from the hayloft and dusted it off. There were some faded and stained portions on the exterior, but other than the broken hinges, it was overall in pretty good shape.

Now that you have your basic tack box located, it’s time to move to Step 2.

Click through for the rest of the steps.

Continue reading

Photos from the Farm – Summer 2017

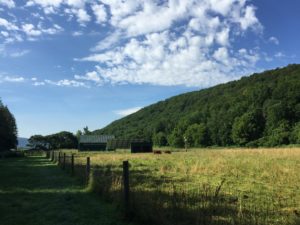
Here are some nice photos from the farm and nearby areas from late spring and summer 2017. Hope you enjoy!

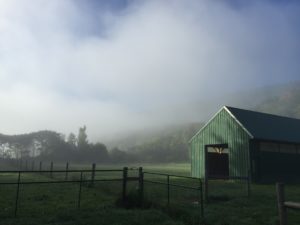
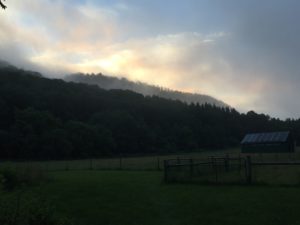
The barn and pasture on a foggy day.

Here is a picture from a boat ride on Cayuga Lake – which is the second largest finger lake in Central New York. The rest of the pictures all come from our farm from various angles.

Sunset over the lake.

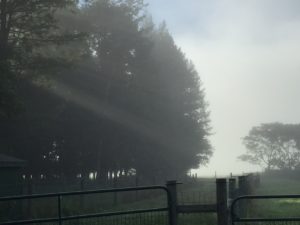
Sunlight breaking through the fog in the morning.

Sunset at the farm.

The cows grazing on a summer day.

Local Wildlife: Red-Tailed Hawk

With a good portion of our pasture surrounded by woods, we sometimes get a chance to see young birds learning to fly – they take off from the trees on the edge of the pasture and flap / glide into the field.  The pastures are relatively safe as the fences block most ground predators.

This year, a juvenile red-tailed hawk came to our pastures to practice flights. However, on one attempt, the hawk’s foot got stuck in the fence and the hawk was stuck hanging on the fence, unable to get free.

By the time we noticed and began to approach, the hawk was able to free itself, but was still either in shock or needed to rest. It sat on the ground near the fence for a couple of hours before flying away.  We checked on it periodically to make sure it wasn’t permanently injured and didn’t need any human intervention.

Juvenile red tailed hawk on the ground.

Here is a video of the hawk on the ground, turning its head to watch us closely as we approach.

We saw the hawk around the area for the next few days afterwards, but it always flew away before we could get anywhere close it.

Billy the Foster Dog

We heard about a dog that was having some trouble at the same shelter in New Jersey from where we adopted Shaffron. He was overly stressed at the shelter and had to be placed in a foster home. However, his first foster home was moving and they couldn’t take him to the new location so he had to go back into the shelter. At the shelter, he was so stressed in the shelter that he drooled so much that he dehydrated himself within hours.

We decided to foster him until he can find a permanent home. His shelter petfinder page is here. The shelter is calling him Pretty Boy but we are calling him Billy (because that’s way better).

Some volunteers drove him the almost 4 hours up to our house. We took him for a walk around the pastures and while he was a bit shy at first, he really liked the quiet open spaces.

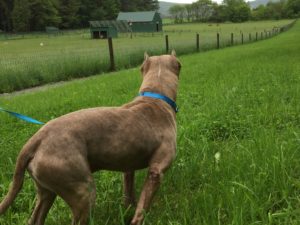
Billy looks out over the pastures.

Here is Billy walking through a puddle.

Billy walking through the water.

Click through to see more photos and videos of how Billy gets along with the farm animals.  Continue reading

The Second Old Stone Pillar

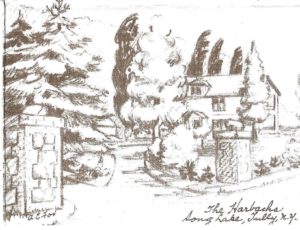
You may recall the old stone pillar along the road that used to be at the end of the driveway of our property many years ago.  However, of the 2 pillars from the old sketch, only 1 stone pillar is still standing. The other pillar was missing, presumed destroyed.

Sketch of our house from the 1950s or 60s.

But.. we think we found the other pillar! Click through for the details.

Continue reading

Stemming the Flow: Building a Small Dam

Following the earlier flooding, we decided to try to build a small dam to try to block the water, rocks, leaves and other debris from flooding out into the pastures.

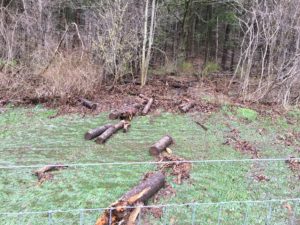
Here is a reminder of what it looked like during the flooding with water and debris flowing out from the woods.

The creek flooding out into the pastures.

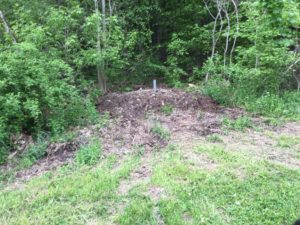
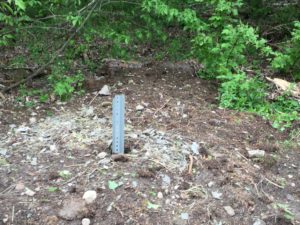
We stacked up the logs again in the water channel where it floods out of the woods.  This time, instead of just stacks of logs, we put a metal post behind the logs and covered them with a couple feet of dirt and rocks.  Hopefully the post and earthen dam will help keep the logs in place and divert the water and debris.

Close-up of the “dam” with metal post holding the logs in place.

Click through for more pictures and details.

Continue reading