Heat from the Earth

Long time readers will recall that we installed a geothermal heating system to replace our old heating oil furnace.

Here are a few more details about the geothermal thermal system and the installation process.

A geothermal heating and cooling system is essentially a heat pump system that uses the relatively constant temperature underground to move heat from one place to another. The systems are also sometimes called ground source heat pumps.  In the winter, the system pulls heat from the ground and moves it into the house. In the summer, such a system can move heat from the house to the ground. Because our house does not have air ducts and instead relies on baseboard hot water radiators, our system is currently set up only for heating, though the ground loops and the heat pump can be used for cooling in the future if we make a few changes inside the house.

Our system is a closed loop system – meaning water (plus a type of antifreeze) is circulated in a loop of piping from the house to wells underground and then back up to the house to start the loop over.

The loop piping in the backyard before installation.

Our installers used a specialized German drilling rig that can fit in tighter spaces compared to some truck based drilling rigs. It was able to move right into place in the backyard for drilling.

The specialized German drilling rig.

Continue reading

Harriet’s Horn

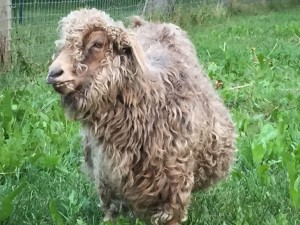
Both of Harriet’s horns had already broken off before we bought the farm – long time readers will remember that Harriet was one of the 2 original goats that came along with the farm from the prior owners.

However, the prior breaks did not completely stop the horns from continuing to grow. Pieces of each of her horns are still growing slowly. The remnant horn growths are called scurs.

Unfortunately one or her scurs was growing but curving back towards her head and was close to touching her skull. It needed to be cut or removed to prevent the horn from pushing against her skull.

We asked the vet to perform the procedure as we hadn’t previously cut or removed a horn ourselves (though we did deal with the aftermath after another goat broke off a piece of his horn). The vet’s initial plan was to just remove a small portion off the tip of the scur so it wouldn’t be touching her skull. Given Harriet’s advanced age and slow growth of the scur, it would have been unlikely that the horn would grow enough to touch her skull again.

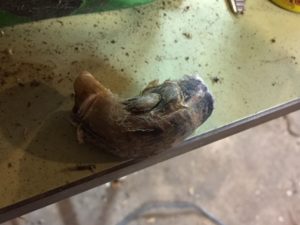
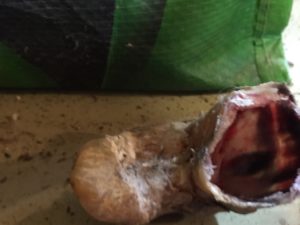
Harriet’s horn.

However, not everything goes to plan. While the vet was beginning to cut the tip of the horn, the entire horn scur broke off!

The vet had already numbed Harriet’s head all around the horn so Harriet was not in immediate pain. But we needed a way to seal the horn and stop the bleeding.

Continue reading

Cookies!

Every year for the holidays, I make several varieties of cookies to share at my workplace. The most common are chocolate chip cookies.

Chocolate Chip Cookies

The “secret” recipe I use is actually basically on the back of the bag of chocolate chips with a couple of small modifications.

  1. Beat 1 cup (2 standard sticks) of butter, 1 cup brown sugar, and 1/2 cup granulated white sugar until creamy.  I prefer to use unsalted, uncultured pasture butter, but other butter works well.
  2. Beat in 2 large eggs, one at a time, until well blended. I prefer to use farm fresh eggs from free range hens for the extra bright orange egg yolks.
  3. Add in 2 Tablespoons water and 1 Tablespoon pure vanilla extract and then blend well. This is a difference from the “traditional” recipe – the traditional only uses 1 teaspoon of vanilla.
  4. In a separate bowl, combine 2 1/2 cups all-purpose flour, 1 teaspoon baking soda and 1 teaspoon salt. For the flour, I sometimes use 1 cup of whole wheat white flour and 1 1/2 cups of normal flour to add a little more chewiness to the structure of the cookies.
  5. Gradually stir the flour mixture into the butter/sugar mixture.
  6. Stir in one normal bag (12 oz) of chocolate chips. For a little more sugary taste, use milk chocolate chips. For a more traditional, use semi-sweet chips. For other options, try mint chocolate chips or other flavors.
  7. Once the dough is prepared, try to not to eat all of it raw! If you succeed in not eating all of the dough raw, roll the dough into teaspoon size balls and place on a baking sheet about 2 to 3 inches apart. The greater amount of whole wheat flour that you use allows you to space the cookies closer together as the whole wheat flour helps the cookies stay more compact while baking while cookies made with white flour tend to expand a bit more while baking.
  8. Bake at 375 degrees for approximately 8 or 9 minutes. Note that the traditional recipe calls for 12 to 15 minutes but that makes the cookies too crisp for my liking. Also, at around minute 6 and again when removing them from the oven, I smash down the cookies with a spatula to keep them thin and prevent the middle from fully cooking.
  9. After a few more minutes on the baking sheet, remove the cookies to cool on wire racks. Usually the cookies are still droopy and some may fall between the wire racks – this is as intended. Once fully cooled (or even before), the cookies will be deliciously soft and ready to eat.

Continue reading for the peppermint candy cane cookie recipe.

Continue reading

Bonus Surprise from the New York State Fair (2017 edition)

The 1 Partridge Rock, 2 Andalusians and a fried dessert calzone weren’t the only things we picked up from the NY State Fair last year.

We also purchased a champion hen. Meet Mille:

Mille (Pronounced Milly)

Mille is a bantam Mille Fleur d’Uccle hen. Their plumage pattern looks like a bunch of small flowers and in French, Mille Fleur means “Thousand Flowers”.

Mille won …

Continue reading

Tiny!

We have a new dog – Tiny!

Tiny.

One of our friends who works at the local shelter (the same one where we got Penny) told us that there was a 14 year old and sick yorkie at the shelter whose elderly owner had died. The family did not want to keep her.

We went to the shelter to meet Tiny. She seemed lethargic and sort of sick. She had a stubborn infection. She had some rotting teeth that gave her very bad breath. She is mostly blind and deaf. Her lower jaw is off center. The shelter was not sure how long she would last.

We brought Penny and Shaffron to meet her at the shelter and Tiny mostly ignored the other dogs.

We took Tiny home as a foster dog. The shelter stated that they didn’t expect any heroic efforts to keep her alive. This was in mid-November.

Continue reading

Surprise from the New York State Fair (2017 edition)

Long time readers may recall that we purchased several chickens from the New York State Fair in 2016.  We of course went to the state fair again in 2017, with extra time spent at the poultry building.

We ended up with a number of new chickens once again in 2017.

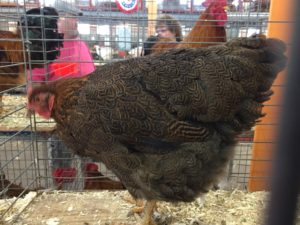
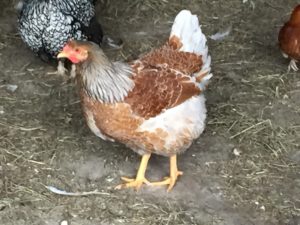
We really liked the intricate feather pattern on the Partridge Rock hen so we purchased the only one on display.  She is a bit older than many of the birds on display – she was over 2 years old and had already been in a number of shows and events before the fair.

Partridge Rock hen in her cage in the poultry building at the NY State Fair – 2017.

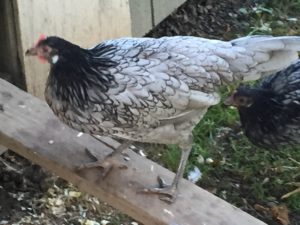
In addition to the Partridge Rock hen, we also purchased 2 Andalusian hens. Andalusians are fairly small for full size chickens and pretty fast on the ground. They are also decent flyers compared to other breeds. At least one of them has been flying up into the hayloft to lay eggs occasionally. They have a variety of coloring with blue (gray) with various black lacing. Our 2 Andalusians are named Andi and Luci.

Andalusian hen outside the coop.

Continue reading

Baby Chicks Join the Flock

The day old chicks were already out of the house and in a crate in the barn.

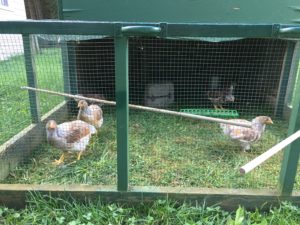
They quickly outgrew the crate and needed some more space. At around age 6 to 7 weeks, we moved them into the movable chicken tractor so they could experience full outdoor weather for the first time and better hone their foraging skills before merging with the main flock.

The chicks in the chicken tractor.

Here is a video of the chicks their first day in the chicken tractor:


The chicken tractor is moved every couple of days to a new spot to avoid dead spots in the pasture from too much foraging and digging. After a couple of weeks in the chicken tractor, the chicks were finally ready to join the main flock.

Click through to see pictures and videos of the chicks joining the main flock.

Continue reading

How to Transport a Goat: Take Two

A local charter school hosted a farm animal day during their day camp over the summer. As one of the few farmers in the area raising fiber goats, we were asked to bring one of our goats to show and explain to the children. That meant another chance to transport one of our goats off the farm.

When preparing to transport a farm animal directly in the car outside of a crate when you don’t have a pickup truck or trailer, it is important to have the right set up so everything goes well and doesn’t ruin the inside of the car.

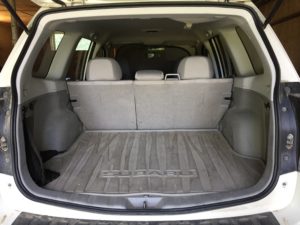
In our case, we used the cargo area of our Subaru Forester. Here is a picture before goat preparations.

The cargo area before goat preparations.

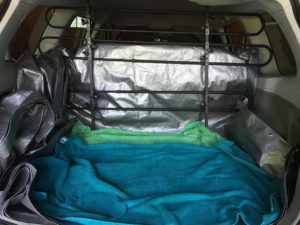
First, we placed a waterproof tarp over the entire area, folding up the sides where necessary so any fluids remain trapped on the tarp. Then, we installed the temporary pet barrier so the goat couldn’t jump over the back seat. Finally, we placed towels on top of the tarp so it was more comfortable and absorbent if necessary.

After preparations.

Finally, you just need to add a goat…

Continue reading